

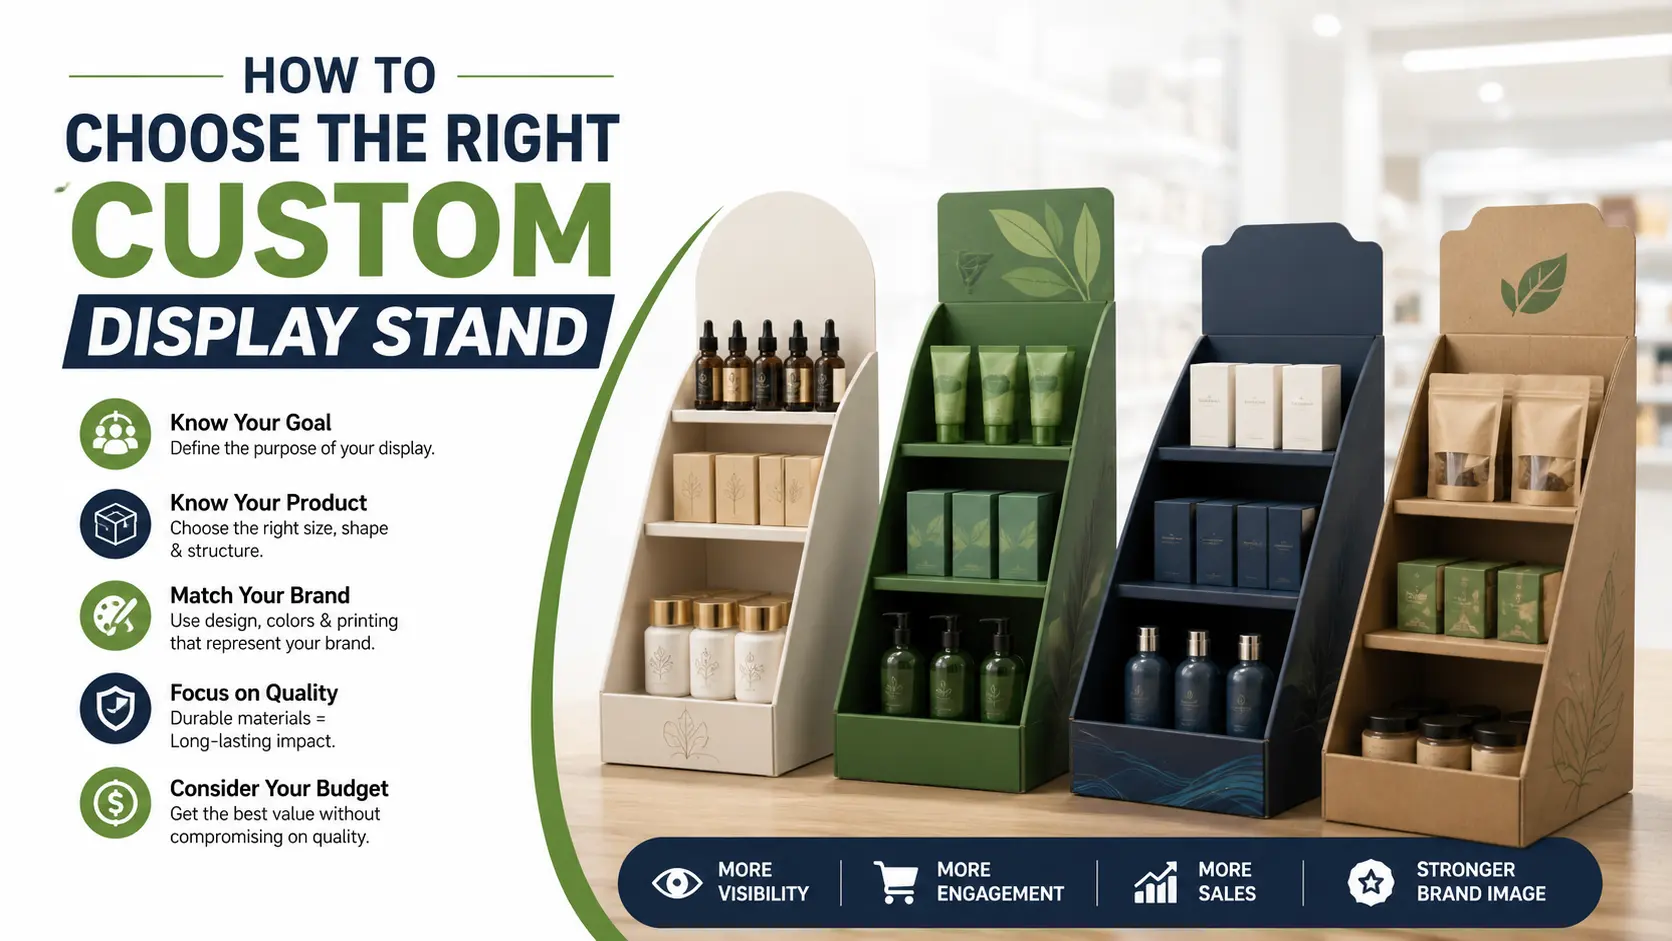
Picking the wrong display stand is one of the most expensive mistakes a brand can make.
Not because the stand costs a lot of money, though it does. But because the wrong display stand wastes a retail placement, gets rejected at a retailer’s distribution center, or sits ignored on a trade show floor while the booth next door draws a crowd.
The right display stand does the opposite. It puts your product at eye level. It carries your brand in full color. It meets every retailer’s compliance requirement without a single rejection. And it converts strangers into buyers day after day without you having to be there.
72% of purchase decisions happen right at the point of purchase. Your display stand is the tool that wins that moment.
So how do you choose the right one?
This guide gives you a clear 7-step framework for picking the right display stand, whether you are placing products in a retail store, exhibiting at a trade show, or doing both at the same time.
Why This Decision Is More Complex Than It Looks
Most brands think choosing a display stand is simple. You pick a style. You print your logo. You put it in the store.
But here is what actually happens to brands that skip the decision framework.
They order the wrong size. The display is too tall for the store’s planogram. The retailer rejects it on arrival. The brand is stuck with 500 display stands they cannot use.
They pick the wrong board grade. Cardboard loses 30 to 40% of its structural strength in humid distribution centers such as those in Florida and Louisiana. A display built without accounting for humidity fatigue collapses under product weight before it ever reaches the store floor.
They skip the retailer compliance step. Kroger enforces a strict 2-inch blemish rule; a single split board over 2 inches triggers automatic pallet rejection at their distribution centers. Brands that do not know this ship non-compliant displays and pay the price in chargebacks and rejected shipments.
They choose a trade show display that takes 4 people and 2 hours to assemble. The trade show doors open at 9 am. The team arrives at 8 am. The display is still not built.
Every one of these problems is avoidable if you use the right decision framework before you order.
The 7-Step Framework for Choosing the Right Custom Display Stand
Work through these seven steps in order. Each step narrows your options until the right display stand becomes obvious.
Step 1 – Know Your Environment: Retail or Trade Show?
The very first decision is the most important one. Retail display stands and trade show display stands have completely different requirements, different materials, different structures, different footprints, and different goals.
Retail display stands live in a store for weeks or months. They hold heavy product. They get restocked repeatedly. They must survive humidity, cleaning crews, and customers who bump into them. They need to meet specific retailer compliance specs for height, footprint, and weight. And they need to drive purchase decisions from shoppers who did not know they wanted your product when they walked in.
Trade show display stands are set up in a booth for 1 to 3 days. They do not hold product; they hold attention. They need to set up in under 30 minutes without tools. They need to pack flat into a carry case that fits in a rental car trunk. And they need to stop strangers on a crowded show floor within 3 seconds.
Same goal: attract attention and drive conversion, but completely different design requirements. Know which environment you are building for before you make any other decision.
Step 2 – Know Your Product
Your product determines your display stand’s structure. Specifically, its size, weight, and shape.
Product size decides shelf depth, display width, row count, and carton packing method. Buyers should send accurate product dimensions: length, width, height, and unit weight. If the product has an irregular shape, photos and physical samples are even more helpful.
Here is what your product tells you about your display.
Product height determines shelf spacing. Add 1 to 2 inches of clearance above your product’s tallest point on every shelf. Products that tip over or jam against the shelf above look bad, restock slowly, and frustrate store staff.
Product weight determines board grade. A display built with a Safety Factor of 3.54 means: if your product load is 100 pounds, the display is built to withstand 350 pounds before failure. This safety margin accounts for humidity fatigue, stacking in distribution centers, and the real-world forces displays face before they ever reach the store floor.
Use this guide for board grade selection by product weight per shelf.
Under 5 lbs per shelf E-flute corrugated – lightweight, good print surface, adequate for counter displays and light retail products
5 to 15 lbs per shelf B-flute corrugated – the most common retail floor display grade, strong compression resistance, good print surface
15 to 35 lbs per shelf C-flute corrugated – heavier product like full-size beverages, pet food, canned goods
35 to 80 lbs per shelf EB double-wall corrugated – pallet displays, bulk club store formats, very heavy products
Product shape determines cavity engineering. Tall bottles can tip. Soft pouches can slump. Round containers can roll. Thin blister packs can twist if the peg hole position is weak. The display should support the product at the base, sides, or hanging area without hiding too much of the packaging.
Step 3 – Know Your Retail Environment
Every retail environment has different rules about floor space, display height, and where a display stand can be placed. Ignore these rules and your display gets moved, removed, or rejected before a single customer sees it.
Convenience store/pharmacy (small footprint) Available floor space: 12×12 to 16×16 inches Max display height: 54 to 60 inches Best display type: Compact floor standing display or counter display unit
Specialty retail/boutique Available floor space: 12×12 to 20×20 inches Max display height: 54 to 72 inches Best display type: Counter display or slim floor standing display
Grocery/supermarket Available floor space: 16×16 to 24×24 inches Max display height: 60 to 72 inches Best display type: Floor standing display or endcap requires buyer approval
Mass retail (Walmart, Target) Available floor space: Per planogram specification Max display height: Per planogram specification Best display type: Per planogram – structural spec sheet submission required
Warehouse club (Costco, Sam’s Club) Available floor space: Standard pallet footprint Max display height: 72 to 84 inches Best display type: Pallet display – drop-and-shop format required
Step 4 – Know Your Retailer’s Compliance Requirements
This step stops more display programs than any other. Major retailers have very specific rules and a display that does not meet those rules gets rejected at the distribution center, not at the store.
Retail compliance is not a one-time check at the end of the process. It requires securing approvals at multiple stages, starting with a concept rendering, followed by a structural drawing, and most importantly, a physical prototype sent to the retailer for in-store testing. This allows the retailer to assess stability, ease of assembly, and overall fit within their store environment. Skipping this step leads to costly surprises and marks you as an unreliable partner.
Here are the compliance specs you need to know for the biggest US retailers.
Walmart Max floor display height: 60 to 72 inches depending on department. Footprint: Per planogram specification. Submission: Structural spec sheet and weight certification required via Retail Link. Notes: Category-specific rules apply, always confirm with your buyer
Target Max floor display height: 60 to 66 inches. Footprint: Per planogram. Submission: Vendor standards manual compliance required.d Notes: Red card branding restrictions apply to checkout areas
Kroger Pallet footprint: 48×40 inches, note this is reversed from the 40×48 orientation used by Target, CVS, and Walgreens. Always verify the length/width orientation in the purchase order. Max height: 66 inches including pallet. Max weight: 2,000 lbs. PDQ requirement: PDQ displays must hold over 40% of their own product weight. Blemish rule: A single split board over 2 inches triggers automatic pallet rejection. Submission: GS1-128 labeling required on the front-facing long side
Walgreens / CVS Max floor display height: 54 to 60 inches. Footprint: 10×10 to 16×16 inches. Submission: Yes for floor placement. CDU varies. Notes: Power wing and endcap preferred; floor space is very limited
Independent retail Height: Flexible – confirm with store manager Footprint: Flexible Submission: Typically not required Notes: Store manager approval is standard, easier to get than chain retailer approval
Step 5 – Choose Your Display Type
Now that you know your environment, your product, and your compliance requirements, you can choose the right display type.
Counter Display Unit (CDU) Best for: Small products under $15, impulse buys, checkout placement, brands with limited floor access. Footprint: 6×6 to 12×12 inches Height: 8 to 18 inches Capacity: 12 to 60 units No retailer approval typically required
Floor Standing Display Unit (FSDU) Best for: Products $15 and above, new product launches, high-traffic aisles and entrances, brands with retailer floor placement agreements Footprint: 12×12 to 24×24 inches Height: 48 to 72 inches Capacity: 50 to 200+ units Retailer approval required for most chain environments
Endcap Display Best for: Category-leader brands, new launches, seasonal promotions Footprint: Matches gondola width, typically 36 to 48 inches wide Height: 60 to 72 inches Capacity: 100 to 300+ units Always requires buyer or category manager approval
Sidekick / Power Wing Display Best for: Complementary products, impulse add-ons, brands that cannot get floor space but can get gondola side placement Footprint: 10×10 to 14×14 inches Height: 24 to 48 inches Capacity: 20 to 60 units
PDQ Tray (Pretty Darn Quick) Best for: Shelf-ready replenishment, grocery and pharmacy, brands that need fast store staff setup Footprint: Matches shelf depth, typically 12 to 24 inches deep Height: 4 to 8 inches Capacity: 12 to 48 units
Pallet Display Best for: High-volume products at Costco, Sam’s Club, and Walmart floor Footprint: 40×48 inches (standard) or 48×40 inches (Kroger) Height: 72 to 84 inches Capacity: 200 to 1,000+ units
Step 6 – Choose Your Material and Finish
The material and finish of your display stand communicate your brand positioning before anyone reads a word of copy on it.
For standard retail and high-volume programs: B-flute or C-flute corrugated with white-top liner, good print surface, strong compression resistance, humidity-resistant coating available. Flexographic 1 to 6 color printing or digital CMYK for full photographic quality.
For premium retail and brand-focused programs: Litho-laminated corrugated, a full-color offset printed sheet laminated to the corrugated board. Produces photographic quality graphics on a corrugated structure. The most visually impactful option for a corrugated display.
For luxury positioning: Rigid board with premium wrap, same construction as a rigid gift box applied to a display stand structure. Used for high-end cosmetics, jewelry, and luxury consumer goods at specialty retail.
Finish options that matter most:
Gloss lamination – vibrant, bold, high-energy. Works for food, beverage, toys, and any brand with bright visual identity.
Matte lamination – flat, premium, sophisticated. Works for cosmetics, wellness, supplements, and any brand signaling quality over energy.
Spot UV – gloss accent on a matte surface. Logo and key visual pop against a flat background.
Aqueous coating – protective, semi-gloss, recyclable. The right choice when recyclability is a brand requirement.
Safe, smooth edges are required on all retail displays to prevent paper cuts for shoppers. Any corrugated edge that a customer might touch- shelf lip, side panel corner, product opening must be scored, folded, or coated to eliminate sharp paper edges.
Step 7 – Plan Your Launch Timeline
This is the step that every first-time display buyer underestimates, and it is the one that most often causes a retail launch to miss its window.
A display that arrives late, is missing parts, or fails to meet a retailer’s specific guidelines can derail a campaign before it even starts. Achieving retail readiness is about meticulous planning across design, logistics, compliance, and communication.
Here is a realistic timeline for a retail display stand program.
Week 1 – Brief and dieline engineering: Share product dimensions, weight, footprint requirements, and retailer compliance specs. The structural engineer builds the dieline and confirms board grade and weight capacity.
Week 2 – Artwork and 3D mockup: Your brand artwork is laid onto the dieline. You review a 3D digital mockup and approve or request revisions.
Week 3 to 4 – Prototype production: A physical prototype is produced. You review it in person, check shelf spacing, product fit, stability, and print accuracy. The prototype also goes to the retailer for compliance review if required.
Week 5 to 6 – Production: Full production run begins after prototype approval. Standard turnaround is 10 to 12 business days from artwork approval.
Week 7 – Shipping and retail arrival: Displays ship flat-packed to your warehouse or directly to retail distribution centers. In-store setup follows the retailer’s stocking schedule.
Total timeline: 6 to 8 weeks from brief to store floor. Plan backward from your in-store date. If you need displays in stores by November 1 for the holiday season, your brief needs to start by the first of September.
Choosing a Display Stand for Trade Shows: A Different Decision
Trade show display stands follow a completely different decision logic than retail display stands. Here is what changes.
Goal Changes
Retail display stands sell a product. Trade show display stands start a conversation. 81% of trade show attendees possess direct buying authority. Your display stand is not trying to sell a $5 candy bar to an impulse buyer. It is trying to stop a VP of purchasing from walking past your booth and get them to spend 10 minutes with your team instead.
Size Decision: Match Your Booth Space
Start with your booth size since it determines which products physically fit your space. For a 10×10 booth, the most effective all-around display is a fabric pop-up backwall or collapsible backwall system. For a 10×20 space, pair a 10-foot backwall on each end with a counter or literature stand in the center. This gives you depth, defined zones for conversation, and room for product demonstration without the cost of a full custom exhibit.
Tabletop display (6 to 8 feet wide) Best for: Small conference rooms, hosted buyer meetings, very small shows Cost: $50 to $300 Setup time: Under 5 minutes
10×10 booth backwall (10 feet wide) Best for: Standard trade show booth, most common format at US trade shows Cost: $500 to $1,500 for a fabric popup or collapsible backwall with printed graphics Setup time: 10 to 20 minutes, 1 to 2 people
10×20 booth system (20 feet wide) Best for: Established brands wanting more floor presence and dedicated demo space Cost: $1,500 to $5,000+ Setup time: 20 to 45 minutes, 2 to 3 people
Custom island exhibit (20×20 feet or larger) Best for: Enterprise brands at major industry shows (CES, Natural Products Expo, Pack Expo) Cost: $10,000 to $100,000+ Setup time: Professional installation required
Budget Decision: Spend 10 to 15% on Display Hardware
A common rule of thumb is to spend roughly 10 to 15% of your total event budget on display hardware. Booth space rental at a mid-size show runs $2,000 to $5,000 for a 10×10. Shipping and drayage add $200 to $800 depending on the show and freight weight. For a first-time exhibitor working with a total budget of $5,000, that puts the display hardware budget at $500 to $750, enough for a quality fabric popup backwall with printed graphics.
Portability Decision: How Many Shows Do You Do Per Year?
1 to 2 shows per year: A retractable banner stand or fabric popup is enough. Low cost, easy to store, easy to ship.
3 to 6 shows per year: A collapsible backwall system or modular display, more polished than a banner stand, still portable enough for one person to manage.
7 or more shows per year: A modular SEG (silicone-edge graphics) system, professional grade, tool-free assembly, graphics that swap out for different shows or seasons, ships in wheeled cases designed for air and ground freight.
The 3-Second Rule for Trade Show Displays
Every second your display stands before a prospect is a high-stakes moment for your brand. Trade show attendees walk past hundreds of booths. Your display has 3 seconds to make them stop.
Here is what makes a trade show display stop people in 3 seconds.
One big visual, not ten small ones. A single large image that fills most of the back wall. Not a grid of twelve photos. Not a wall of text. One image that communicates what you do in an instant.
One big headline, not a paragraph. Six words or fewer printed very large. If someone needs to walk close enough to read it, it is too small and too long.
One clear brand name or logo, positioned top-center. Attendees look for the company name first. Put it where their eyes naturally go, top center of the back wall, large enough to read from 20 feet away.
Bold color contrast. The booths that stop people have high contrast between background color and text or image color. Light on dark or dark on light, not medium on medium.
The Retail Display Checklist: 7 Questions Before You Order
Use this checklist before you place any display stand order for a retail program.
Question 1 – Do I know my product’s exact dimensions and weight per shelf? If no, measure before ordering. The wrong shelf depth or wrong board grade is the most expensive mistake in display production.
Question 2 – Do I know my retailer’s height, footprint, and submission requirements? If no, contact your buyer or category manager and get the compliance document before you design anything.
Question 3 – Have I accounted for humidity in my board grade selection? If your products will be displayed in the southeastern USA, in refrigerated environments, or in stores with high ambient humidity, upgrade your board grade one level above the weight calculation to account for humidity-related strength loss.
Question 4 – Does my display have smooth, safe edges on every customer-contact surface? If no, specify edge scoring, fold treatment, or aqueous coating on all exposed edges before production.
Question 5 – Have I built time for a physical prototype review? If no, add 1 to 2 weeks to your timeline for prototype production and retailer submission. Skipping this step is the most common cause of display program rejection.
Question 6 – Does my display ship flat and assemble without tools in under 5 minutes? If no, reconsider the structural design. Flat-packed display stands reduce shipping volume by up to 60% compared to pre-assembled alternatives. Store staff will not assemble a display that takes 20 minutes and requires a screwdriver.
Question 7 – Does my display look the same at the end of Week 8 as it did at the beginning of Week 1? If no, consider upgrading the board grade or adding a moisture-resistant coating. A display that sags, warps, or loses its shape partway through a retail program does more brand damage than no display at all.
Get Your Custom Display Stand From The Pioneer Packaging
The Pioneer Packaging builds custom display stands for retail stores and trade shows across the entire USA: counter displays, floor standing displays, endcap displays, sidekick displays, PDQ trays, pallet displays, and trade show formats.
No minimum order. Test with a small batch before committing to a full program.
Prices 30% lower than most USA competitors.
Free shipping to all 50 states – no hidden freight fees.
10–12 business day production from art approval.
Free design support – structural dieline engineering, 3D mockup, and artwork layout included.
Retailer compliance support – structural spec documentation available for Walmart, Target, Kroger, Walgreens, CVS, and Costco submission.
Visit thepioneerpackaging.com to get your free quote today.
Frequently Asked Questions
How do I choose the right display stand for my product?
Start with your environment: retail store or trade show. Then confirm your product’s dimensions and weight per shelf, your retailer’s compliance specs, and your available floor footprint. Choose the display type that fits all three: counter display for small impulse products at checkout, floor-standing display for larger products in open floor space, pallet display for high-volume club store formats. Use the 7-step framework in this guide to work through each decision in order.
What happens if my display stand does not meet a retailer’s compliance specs?
The retailer rejects the display at their distribution center before it ever reaches a store. Kroger rejects any pallet with a board split over 2 inches. Most major retailers reject displays that exceed their height or footprint specifications. The brand absorbs the cost of the rejected shipment, the replacement production run, and the lost retail window. Always get the compliance document from your buyer before you design your display.
How strong does a cardboard display stand need to be?
Strong enough to hold your full product load at 3.54 times the actual product weight. This safety factor accounts for humidity-related strength loss; cardboard loses 30 to 40% of its compression strength in humid environments. A display that holds 100 lbs of product should be engineered to handle 350 lbs before failure. Board grade selection: E-flute, B-flute, C-flute, EB double-wall determines the structural capacity. Always specify board grade based on the heaviest product load per shelf, not the average.
Do I need a prototype before I produce a full run of display stands?
Yes, especially for any major retailer program. The prototype lets you physically test shelf spacing, product fit, base stability, and print accuracy before you commit to a full production run. It also serves as the submission sample for retailer compliance review. Most first-time display buyers skip the prototype to save time and money and then face rejection, costly reprints, or structural failures in-store. The prototype saves far more than it costs.
What is the difference between a retail display stand and a trade show display stand?
A retail display stand holds product, survives weeks or months of in-store use, meets specific retailer compliance specs, and drives purchase decisions from shoppers who were not looking for your product. A trade show display stand holds attention, sets up in minutes without tools, packs into a carry case, and starts conversations with qualified buyers who have purchasing authority. Same visual goal, different structural requirements, different materials, different decision criteria.
How long does it take to get custom display stands produced and delivered in the USA?
Standard production runs 10 to 12 business days from final artwork approval. Add shipping time, typically 2 to 5 business days within the USA, depending on destination. Total timeline from brief to store floor is typically 6 to 8 weeks for a complete retail display program. The Pioneer Packaging ships all orders free across all 50 states, with no freight surcharge and no minimum order value required.