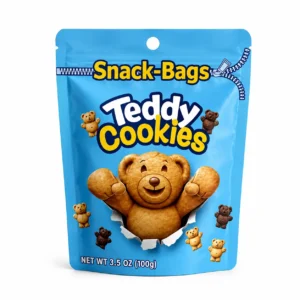
Here’s something people mix up all the time. A zipper is a closure, not a seal. If you want the customer to know nobody’s opened the bag, and you want air kept out for months on a shelf, you’ve got to melt the top shut, and that’s the trick with heat sealable mylar bags, the inside layer fuses to itself with heat and a bit of pressure, so a couple of seconds on an impulse sealer and it’s closed. Until somebody tears it open, anyway.
Who uses them? Small coffee roasters mostly, and supplement brands, tea shops, jerky makers, plus people stocking up food for the long haul. They like knowing for sure. Fill it, seal it, done.
How Heat Sealable Mylar Bags Actually Seal
It’s layers. Outside gets the print, the middle one’s metalized or foil and that’s what keeps light out and slows air and damp down, and the very inside is a plastic that melts sooner than the rest of them do. Clamp the bag in the sealer and only that inside bit goes soft and sticks together across the opening.
Most small brands get a hand or foot impulse sealer. We’d go for a wider bar, something like 5 to 10 mm, because a thin wire one is way less forgiving. Test a few bags first, honestly, it saves headaches. Too hot? The film wrinkles up or burns right through. Too cool and the seal peels open if you so much as tug it. And wipe the seal area before you clamp, because a few coffee grounds or a puff of protein powder stuck in the seam is the number one reason we see bags fail.
Picking Features for Your Sealed Pouches
You can add extras. Most popular is a zipper just under the seal line, customer tears the top off once and then zips it after. Tear notch so nobody’s hunting for scissors. Coffee roasters often want a one-way valve so fresh beans can breathe out without the bag ballooning, and if it’s going on a peg in a shop, punch a hang hole.
Then shape. Flat three-side seal pouches cost the least and are great for samples or storage. Stand-up pouches with a bottom gusset sit up on a shelf, so that’s retail. Packing food to keep for ages? Look at our mylar bags for freeze dried food and mylar bags for rice storage, they’re sized for that. Snacks and pantry stuff on a shelf, it’s our food mylar bags.
Printed Mylar Bags With Your Branding
No stickers. We print full color right onto the film. Our coffee and tea people pick matte nearly every time, scuffs hide in it. Snack brands with loud colors? Gloss. And some want holographic or metallic film just to be the shiny thing on the shelf, which, fair enough. A clear window works too, so people can see inside, just know it lets a bit of light in, so we’d keep windows for products that sell fast.
Leave a blank patch on the back for your batch code and best-by date, stamped or printed later. Our designers set that up as part of the free artwork layout, and they’ll warn you about stuff that prints badly on film, super thin lines mainly. Digital proof before anything runs.
Orders often start around 50 bags depending on the style, and each bag costs less the more you order. Production is 10 to 12 business days after you okay the proof, and ground shipping in the USA is free. Want the long version on films and sizes? Our mylar bags guide covers it, or browse all the mylar and zipper bags.
Heat Sealable Mylar Bags FAQs
Will a household iron seal these bags?
For three or four bags in a pinch, kind of. The seal comes out patchy though, and an impulse sealer isn’t expensive.
Can I have a heat seal and a zipper on the same bag?
Yep. Seal goes above the zipper, they tear the top off once and zip it after that.
Why did my sealed bag pop open?
Usually? Sealer running a little cool, or powder in the seam. Wipe it and bump the heat time up a notch.
More From This Range
Similar options include food mylar bags, custom spout pouches, flat bottom pouch with zipper and standup spout pouches. Browse all of them in mylar and zipper bags. For measurements, see mylar bag types and sizes.